Managing your Comics Plus Collection
The "My Collection" area of your Admin Portal allows you to easily discover and curate your Comics Plus collection. Read below to gain a deeper insight into how to best leverage this area.
How to Access your Comics Plus Collection
2. Type in your username and password.
 Don't know what your username and password are? Contact support@librarypass.com and we will get you this information right away!
3. Once logged in your Admin Portal, navigate to "My Collection" through the pane on the left side of your screen.
Navigating My Collection
There are 3 areas in the "My Collection" module that allow you to fully control your Comics Plus collection.
- Titles - Discover and Manage titles at the title level
- Interest Labels - Manage the Interest labels that appear in your Comics Plus collections
- Automatic Review - Manage the default status of titles when they are added to the Comics Plus collection
Titles
- Filter: You can filter your Comics Plus Collection to discover/identify titles that meet your filtering criteria.
- Bulk Select: You can mass select titles to manage their Status (Enabled, Disabled, In Review) see below for more information on each status.
- Preview: You can read titles right in your Admin portal!
- Sort: Each header in the display has a gray arrow to the left of the header. You can select the header you want to sort your titles by.
- Search: Use this search field to search for specific titles in your collection
- Export: You can export your collection. Applying a filter(s) or entering a search term will narrow down the titles in your display. The Export function will "export" into an excel sheet the titles in the display.
- Status: The status of a title indicates whether or not a title is available for access by your readers. See below for more information on each status.
Filter
You can filter through all titles you subscribe to in your collection by: Status, Age, Language Publishers, Interest Label, and/or Release Date (added to Comics Plus). Once you set a filter, you will only see titles relevant to that filter. You can set multiple filters at a time.
Status - You can filter your collection by the status of your titles. When no status is selected you are viewing all titles within your collection
Status Types:
- Disabled - Titles in this status are not available to any readers of the collection. These titles will not show in your Comics Plus collection for any users. If a title is put into a disabled status after a reader adds the title to their shelf, immediately it will no longer be accessible.
- Enabled - Titles in this status are available to all readers of the collection.
- In Review (recently added) - Titles in this status are not available to any readers of the collection. You can place titles in this status that you wish to review before making the titles available to your readers.
Age - You can filter through titles in specific Age categories - i.e. Children, Kids, etc.
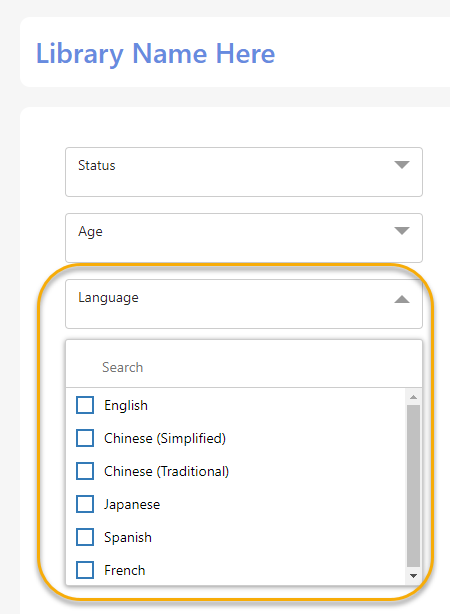
Language - you can filter for titles in different languages
Publishers - You can filter by Publisher of a title
Interests - You can filter by a single Interests, or multiple Interests
Release Date - Release Date refers to the date a title was added to Comics Plus. To filter for titles based on when they were added to your Comics Plus collection, add this filter and indicate the date in reference. For Example: f you want to see everything added the last 2 weeks, simply select "Just Released in the last 14 days".
To remove a filter, simply click the "x" on the filter
Bulk Select
To select multiple titles at a time at least one filter must be selected. Once you have narrowed down your collection to the titles you want to select, click the "select all" box. This allows you to mass update the status of your titles. See the "Status" Section below for more information.
Preview
You can preview titles by clicking on the tile cover or name.

A metadata preview will appear. To read the title click "Read Now". To Exit the Preview screen, click the "x" in the top right corner.
Sort
Each header in the display has a gray arrow to the left of the header. You can select the header you want to sort your titles by.
Search
You can search by title, writer or author of a title. If you have filters selected, your search will only populate titles within your filtered parameters.
Export
You can export your collection and selections within your collection to allow you to gain a deeper understanding of your collection.
Export Full Collection
To export your full collection, simply click "Export" in the top right. Without any filters this will export your full collection.
Export Selected Titles
To export a cross section of titles, use the search and filter tools listed above to narrow down your collection. Once you have narrowed down your selection, simply click "Export" in the top right. Only the titles that appear with your filters will be exported.
Export Active Titles
To export active titles, in your filters choose "Status" and "Enabled". This filters you collection to only your enabled titles and removes all disabled or in review titles. Once you have narrowed down your selection, simply click "Export" in the top right. Only the titles that appear with your filters will be exported.
Status
The status of a title indicates whether or not a title is available for access by your readers.
Status Types
- Disabled -
Titles in this status are not available to any readers of the collection. These titles will not show in your Comics Plus collection for any users. If a title is put into a disabled status after a reader adds the title to their shelf, immediately it will no longer be accessible.
- Enabled -
Titles in this status are available to all readers of the collection.
- In Review (recently added) -
Titles in this status are not available to any readers of the collection. You can place titles in this status that you wish to review before making the titles available to your readers.
Updating the Status on a Title
Individual Title(s): In the "Status" column, locate the toggle switch that corresponds with your selected title. Click the toggle to change the status of the title.
Bulk Selecting: To select multiple titles at a time at least one filter must be selected. Once you have narrowed down your collection to the titles you want to select, click the "select all" box.
You will see a message clarifying whether or not you want to select "ALL" the titles that meet your selection OR just those that appear on the screen. Make your selection.
A dropdown will appear where you can choose to Enable or Disable the selected titles.
Choose the appropriate status and click "Update Status". You will see an alert ensuring you want to move forward. Click "proceed" or "cancel". You will then see a notification indicating the change was made successfully. You will also see the status column on the titles changing to the selected status.
Interest Labels
The interest label area allows you to manage the interest labels that appear in your Comics Plus Collection for your readers.
Where do Interest Labels Appear?
Interest Labels appear within the "Interest" Section of Comics Plus, as well as on individual titles. All labels are defaulted to "Show" in your Comics Plus collection.
The status of a label in this section indicates whether or not the label is visible to your readers.
Interest Label Status
- Show -
When the gray box next to an Interest is selected, that indicates this label is visible to your readers.
- Hide -
When the label box is grayed out and the selection box is not checked, that indicates this label is not visible to your readers.
Hiding an Interest Label
1. Locate the Interest label(s) you want to hide.
2. Deselect the box next to each label.
3. The Interest Label will turn "gray" indicating it is hidden.
Hiding an Interest Label Results in the following
1. The hidden label is removed from your Library's Comics Plus Interests Page on both the web and mobile app
2. The hidden label is removed from all titles that include that Interest.

Please Note - This does not remove any titles in the hidden Interest(s) from your collection, it only removes the label from displaying in your collection. Other interest labels related to that title will still be displayed on the title.
Automatic In Review
The Comics Plus collection is dynamic and always growing, with new titles added regularly from our trusted, library-friendly publishers. By default, all newly added titles are automatically enabled for immediate access, so readers can enjoy the latest content right away.
For libraries that prefer to review new titles before making them available, there is the option to adjust the default setting—placing newly added titles into an "In Review" status. This gives administrators the flexibility to review new content at their own pace before sharing it with their readers.
If this feature is enabled, here’s what to expect:
Your current collection will remain unchanged—meaning all currently enabled, in review, and disabled titles will stay exactly as they are.
Any new titles added after the feature is activated will be placed into the "In Review" status and will not be immediately available to readers.
New titles will need to be manually enabled before they appear in your library’s active collection.
This option ensures your team has full control over the content shared with your community, while still keeping access to our growing collection at your fingertips.
See the "Status" section above for more information on the "In Review" status.
How to Default Newly Added Titles to an "In Review" status
1. Navigate to the "Automatic Review" tab in your "My Collection" Module
2. Click the check box next to "Automatic In Review"
3. Click "Save Changes"
4. Click "Yes" or "Cancel" in the pop up window to confirm or deny this change
How to Default Newly Added Titles to an "Enabled" status
Titles are set to the "Enabled" status by default, if the Automatic Review selection has never been set on your collection, you do not need to take any action to have your newly added titles automatically set to "Enabled". If the default status has been changed at some point to "In Review", follow steps below to set the default back to "Enabled".
1. Navigate to the "Automatic Review" tab in your "My Collection" Module
2. De-select the check box next to "Automatic In Review"
3. Click "Save Changes"
4. Click "Yes" or "Cancel" in the pop up window to confirm or deny this change
How to Review Newly Added Titles in your Collection
When Your Default Status for Newly Added titles is "In Review"
1. In the "Titles" tab under the "My Collection" Module, set the status filter to "In Review"
2. Use the filtering, sort and preview features mentioned above to make a determination on the preferred status of the newly added titles
3. Follow the steps under the "Updating the Status on an Title" above
When Your Default Status for Newly Added titles is "Enabled"
1. In the "Titles" tab under the "My Collection" Module, set the "Release Date" filter to "Release Date After = the last date you reviewed your collection". This will show all titles added to the collection after your last date of review.
Example: you reviewed your collection on 01.01.2025. You return to review your collection on 02.01.25. Your filter should show:
2. Use the filtering, sort and preview features mentioned above to explore your newly added titles
Related Articles
Admin Portal FAQs - Managing Multiple Collections
What Do I Have Access To In My Admin Portal? You can: 1. Access circulation information for all of your collections 2. Manage your member accounts' users 3. Pull MARC Records 4. Curate your member accounts' collections 5. Manage settings How Do I ...Comics & Manga Programming in Schools and Libraries
Drive Engagement and Circulation with Comics & Manga Programming Comics and manga’s ongoing popularity with readers of all ages is no longer a surprise to anyone paying attention, but serving those readers well requires more than simply having a ...MackinVIA FAQs
How Can I make it easy for my patrons to find Comics Plus in MackinVIA? There are a couple options for making it easy for your patrons to find Comics Plus inside their MackinVIA! 1. Set Your MackinVIA Start Page to "Databases" In your MackinVIA ...Follett Software - Destiny Discover FAQs
How Can I Make Comics Plus more accessible within Destiny? Enhance the discoverability of your Comics Plus collection by customizing your Destiny Discover homepage. Add a direct link to Comics Plus right on your Destiny Discover Homepage, to make it ...Comics Plus Circulation Infographic
Use our Infographic in Canva to summarize and share your Comics Plus Collection activity! Click the link above to see multiple variations